Vintage Holiday Celebration: Bust Out Box
- Aug 27, 2025
- 3 min read
Celebration of our treasured Holidays brings families and friends together shorting the distance from miles to moments. This print comerates the most valued holidays reflecting those icons we all recognize with God, Love and Family most of all.
This DIY is simple in application and truly has a WOW factor once finished that will be enjoyed to see year round in everyday Decor or perhaps you will unpack to display at the beginning of the Holiday Season. With the Hare in this print Easter is at the top of the year in spring allthough traditionally it was a hunt for the hare around Christmas. I like to see this as Easter instead to celebrate and that is a beautiful time of year in spring.
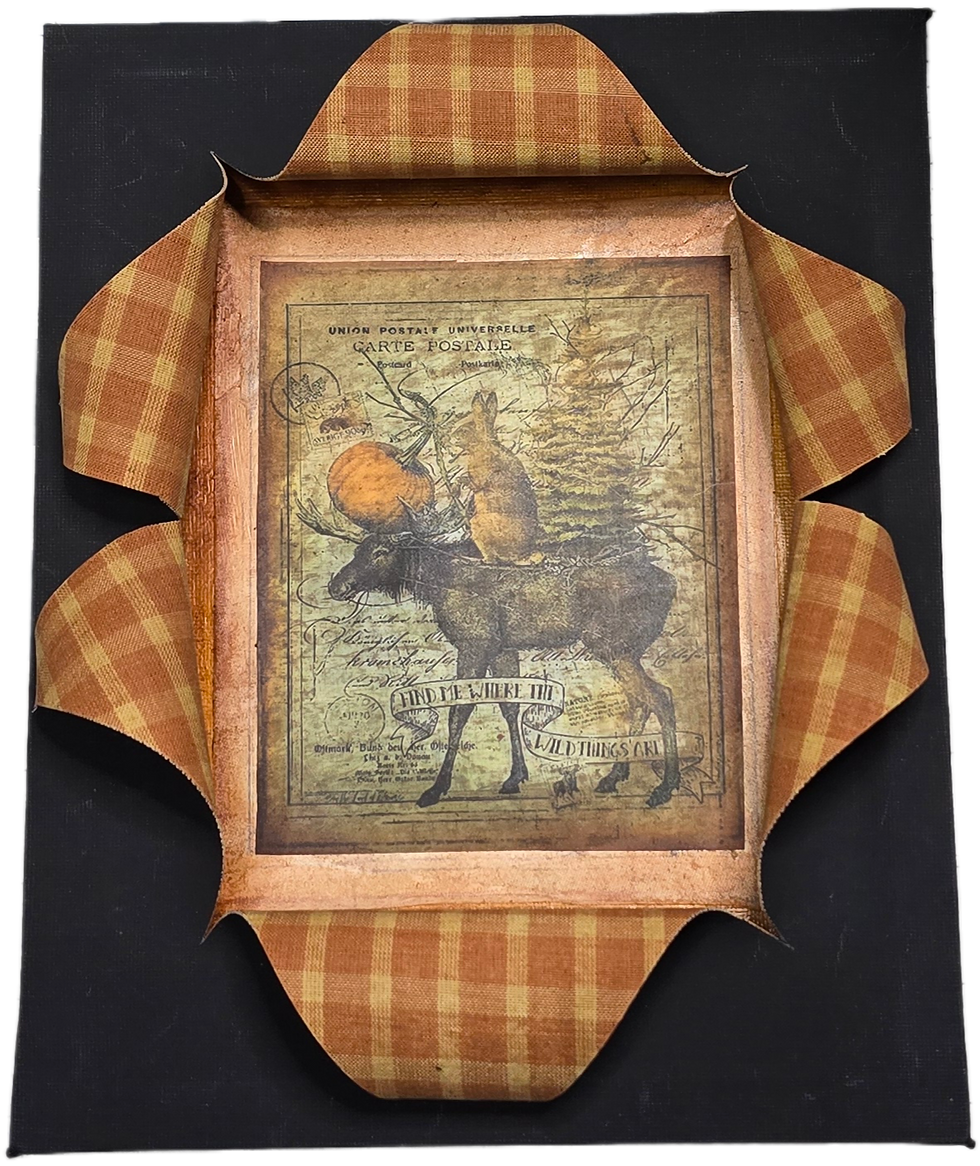
Right-click on the photo to save to your device.

Gather the following supplies to get started, and refer to the full video link below, if you'd like to see all the vital steps to complete the finished product.
Fabric of choice cut 9" x 7" piece
Paint for canvas board; Americana True Ochre was used here
Vintage Celebrate All Holidays Print
8 x 10 Stretch Canvas Black (black in optional, just paint white)
Kraft paper (optional) to cover the back
Start here for instructions to make.
Step: Paint the canvas board with the color you have decided upon to complement your print.
Step: Apply Mod Podge to the back of the stretched canvas, place fabric onto back and apply a coat of Mod Podge over it. Set aside and allow to dry.
Step: Using the painted canvas board, apply Mod Podge to back of the Vintage Celebrate Holidays Print and place onto the center of your canvas board. Apply a thin coat of Mod Podge and allow it to dry. Do not worry too much should you have a few wrinkles; you can use your heat press or a clothing iron to press the print once it has thoroughly dried. Be sure to use a Teflon sheet or pressing sheet to form a barrier between the iron and your print.
Step: Turn the stretched canvas over to the back, placing onto a cutting mat or firm surface. Using your razor knife or rotary cutter, cut a diagonal line from corner to corner, staying 1 inch from the frame. Next, cut a line from the center top to the center bottom, staying one inch away from the frame. Next, cut a horizontal line from the left side to the right side, staying one inch away from the frame.
Step: OPTIONAL: Using stamp ink and a blending brush, smudge edges of print and also apply antique wax onto the boarded canvas, should you like, this step is optional and demonstrated in the video.
Step: Apply hot melt glue to the edges on the back of the stretched canvas frame and attach the bordered canvas print to the frame.
Step: Turn over the Stretched Canvas frame, roll back each cut piece one at a time and glue with hot melt glue into place. At this point, you can see your bust out box taking shape. Once you have all the cut pieces glued back, your piece is finished! VOILA'! The WOW factor of your very own, Did It Yourself finished Vintage Celebrate Holidays Bust Out Box Framed Photo!
* Prefer to Purchase?... Click Here
Be sure to pin the photos to Pinterest boards for your reference on projects you'd like to do it makes an easy reference to find this blog post and instructions plus the photo too. If you aren't following me already, be sure to like share and subscribe. Find more on the Dandy DIYer Youtube Channel and join the Facebook Page too. Using the affiliate links on this page helps to support my channel since a referral commission may be paid when used. Thank you!


Comments