Make Pretty Halloween Witch Hat Decor
- Oct 21, 2025
- 3 min read
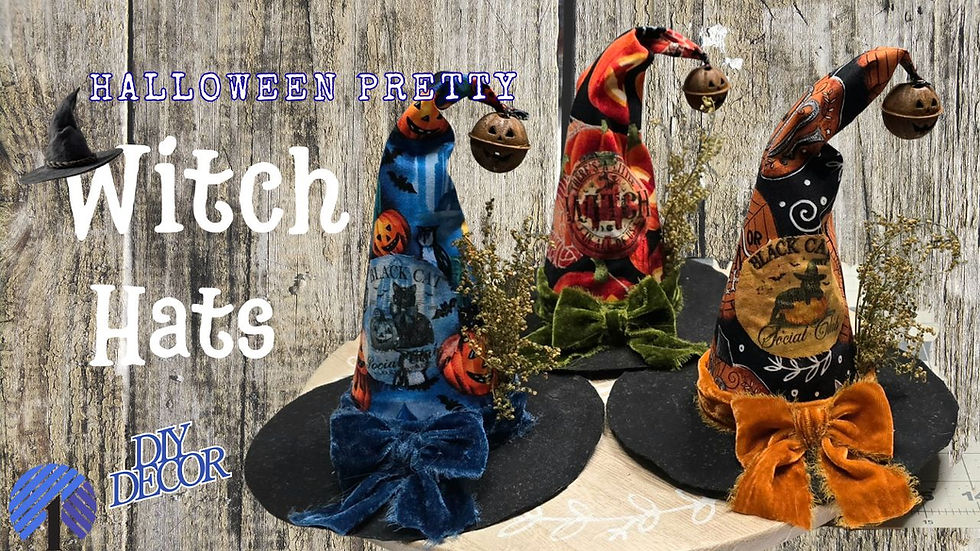
The Witch Hat uses minimal supplies. Easily create a lovely hat with your favorite Halloween fabric; velvet ribbon to match and a few sprigs of Sweet Annie dried florals, and the pattern below.
Using freezer paper to make the decal, you select from those below to set your Witch Hat apart from the ordinary ones, truly. Dollar Tree has a Witch Hat trimmed in tinsel garland that was used to model these Witch Hats. You do not need the Dollar Tree witch hat form to make this 8 inches tall by 6 inches wide Witch Hat, just simply print off the pattern and use kraft packing paper instead.
These Witch Hats are currently available to purchase. Click here.
The following supplies were used to make this gorgeous witch hat.
8" x 8" piece of fabric
(Supplies Use Affiliate Links)
Repurpose a blank label sheet or cut a 8" x 11 1/2" sheet of Freezer Paper (with plastic coating). I recommend Reynolds Freezer Paper
Mod Padge
Flat smooth edge brush
Tacky Glue
***Using any of the affiliate links may pay a referral commission that assists me in keeping my channels going, purchasing supplies and I really appreciate the help. Thank You in Advance!


Make the iron-on transfer
Place Mod Podge onto the used label page and allow it to dry between coats. You will need to apply 3 coats in total before printing onto the sheet.
Select the decals pictured here.
*** Right-click on the photo to save when using a computer or a laptop. Using a mobile device or tablet?... Press and hold on photo and then save or screenshot photos.
create yourself an account and begin creating your labels. Print off or save until ready to print your decals. Place the sheet into the printer and print your labels. Further down the page here.
Remove all the tinsel from the Witch Hat Dollar Tree form
Use or repurpose packing paper and wrap a witch hat using the pattern to cut out paper, this will work as a stabilizer for the Witch Hat form and smooth the surface knobs quick and easy.
Cut out all fabric and kraft paper parts from the pattern page.
attached the fabric to the hat form
attached a brim to the stabilizer, Kraft paper
Add a velvet ribbon above the brim edge of the hat
Create a decal to be attached to the front of the Witch Hat and then appeal
Bend the Witch Hat to create a crooked hat. (optional)
Attach a metal Jack-O-Lantern with a needle and thread
Gather and make a small bundle of the dried florals, and attach to side profile of the Witch Hat
Create a Velvet Ribbon Bow to finish the look of your very own Pretty Halloween Witch Hat
To see how the decal and the Witch Hat were made, and to leave a review. Share this blog too!
Save this photo and crop as you like to ensure you get all the ones you want. This is my original creation shown in video and this is easier than doing each of these on here individually. This is a JPG file and can be resized to fit any project. Enjoy

Share this post, pin on Pinterest and save to return for more crafty ideas!


Comments